


Tarakan
The primary objective for the Allied attack on Tarakan (code-named "Oboe One") was to secure and develop the island's airstrip so that it could be used to provide air cover for subsequent landings in Brunei, Labuan and Balikpapan. The secondary objective for the operation was to secure Tarakan's oilfields and bring them into operation as a source of oil for the Allied forces in the theatre. Allied intelligence estimates of Japanese defences as of April 1945 and code names for locations in southern Tarakan.
The 9th Division and 26th Brigade headquarters were responsible for planning the invasion of Tarakan. This work began in early March when both units had arrived at Morotai, and the final plans were completed on 24 April. The planners' work was hampered by poor working conditions and difficulties in communicating with General MacArthur's General Headquarters at Leyte.
The Allied plans anticipated that Tarakan would be secured quickly. It was excepted that the operation would involve a short fight for the airfield followed by a 'consolidation' phase during which the island's airfield and port would be developed to support Allied operations. The planners did not foresee significant fighting in Tarakan's interior, and no plans were developed for operations in areas other than the landing beaches, Tarakan Town and airfield. The planners did, however, correctly anticipate that the Japanese would make their main stand in an area other than the invasion beach and would not be capable of mounting a large counter attack.
The Allied plans also expected that Tarakan would be transformed into a major base within days of the landing. Under the pre-invasion planning it was intended that a wing of fighter aircraft would be based at Tarakan six days after the landing and this force would be expanded to include an attack wing nine days later and staging facilities for a further four squadrons of aircraft within 21 days of the landing.
It was also expected that the 26th Brigade Group and its supporting beach group would be ready to leave Tarakan by 21 May and the RAAF units could be redeployed in mid-June after providing support for the landing at Balikpapan.
The Allied planners possessed detailed intelligence on Tarakan and its defenders. This intelligence had been gathered from a variety of sources which included signals intelligence, photographic reconnaissance flights and Dutch colonial officials. Tarakan was the Australian Services Reconnaissance Department's (SRD) first priority from November 1944. However, the difficulty of infiltrating operatives into such a small island meant that the organization could only provide limited aid to the planners.
Allies
The Allied force responsible for capturing Tarakan was centered around the almost 12,000 man strong Australian 26th Brigade Group. The 26th Brigade had been formed in 1940 and had seen action in North Africa and New Guinea. The brigade's infantry component was the 2/23rd, 2/24th and 2/48th Battalions, all of which were highly experienced. These battalions were joined by the 2/4th Commando Squadron and the 2/3rd Pioneer Battalion, which fought as infantry in this battle. The brigade group also included the 2/7th Field Regiment equipped with 24 25-pounder guns, a squadron from the 2/9th Armoured Regiment operating 18 Matilda tanks, a company of the 2/2nd Machine Gun Battalion, the 53rd Composite Anti-Aircraft Regiment and two engineer field squadrons. These combat units were supported by a large number of logistics and medical units, including the 2nd Beach Group whose role was to land supplies from the invasion fleet. While the 26th Brigade Group greatly outnumbered the known strength of Tarakan's Japanese defenders, the Allies committed this large force as their previous experience indicated that it would be difficult to defeat the Japanese force if it retreated into Tarakan's rugged interior.
The 26th Brigade Group was supported by Allied air and naval units. The air units were drawn from the Australian First Tactical Air Force (1 TAF) and United States Thirteenth Air Force and included fighter and bomber squadrons. The naval force was drawn from the United States Seventh Fleet and included several Royal Australian Navy warships and transports. Since the main objective of attacking Tarakan was to use the island's airstrip, the invasion force also included a large number of Royal Australian Air Force ground units, including No. 61 Airfield Construction Wing
Comprising of No.1 and No. 8 Airfield Construction Squadrons. The force which landed on Tarakan included nearly a thousand United States and Dutch troops. The U.S. troops included the U.S. Army engineers who manned the invasion force's landing craft and LVTs and United States Navy Seabee detachments onboard the Landing Ship Tanks. The Dutch forces were organized into a company of Ambonese infantry commanded by Dutch officers and a civil affairs unit.
Japan
At the time of the Allied landing, the Japanese force on Tarakan numbered 2,200 men drawn from the Imperial Japanese Army and Imperial Japanese Navy. The largest unit was the 740-man strong 455th Independent Infantry Battalion which was commanded by Major Tadai Tokoi. 150 Army support troops were also on Tarakan. The Navy's contribution to Tarakan's garrison comprised 980 seamen commanded by Commander Kaoru Kaharu. The main naval unit was the 600-strong 2nd Naval Garrison Force. This naval unit was trained to fight as infantry and operated several coastal defence guns. The 350 Japanese civilian oil workers on Tarakan were also expected to fight in the event of an Allied attack. The Japanese force included about 50 Indonesians serving in a home guard unit. Major Tokoi directed the overall defence of Tarakan, though relations between the Army and Navy were poor. The Japanese forces were concentrated around Lingkas, Tarakan's main port and the site of the only beaches suitable for landing troops. These defenders had spent the months before the invasion constructing defensive positions and laying mines. These fixed defences were used extensively during the battle, with Japanese tactics being focused on tenaciously defending pre- prepared positions. The Japanese did not conduct any large counter-attacks, and most offensive actions were limited to small parties of raiders which attempted to infiltrate the Australian lines.
Preparatory operations
The Japanese force on Tarakan was warned of the impending invasion in April, before the Allies began their pre- invasion bombardment of the island. The island's commander received a radio signal warning him of imminent attack, and the commander of Tarakan's oil depot was ordered to destroy the oil wells on 15 April. It is possible that this warning may have been issued as a result of a security leak from either the Chinese Republican Army's representative to Australia or MacArthur's headquarters. This did not have any effect on the subsequent battle, however, as the Japanese had been preparing defences to resist invasion for several months and the Japanese were aware of the large Allied force which was being assembled at Morotai to attack Borneo.
Prior to the arrival of the invasion force the Japanese garrison on Tarakan and Borneo was subjected to intensive air and naval attacks from 12 April to 29 April. The RAAF and USAAF also mounted air attacks against Japanese bases in China, French Indochina and the NEI to suppress Japanese air units throughout the region. These attacks destroyed all Japanese aircraft in the Tarakan area. The aerial bombing of Tarakan increased in intensity five days before the landing. These attacks were focused on the areas adjoining the planned landing beaches at Lingkas and sought to neutralize the Japanese defences in these areas. The oil storage tanks at Lingkas were a key objective as it was feared that the oil in these tanks could be ignited and used against Allied troops. These bombardments forced much of Tarakan's civilian population to flee inland.
The Tarakan attack force was assembled at Morotai during March and April 1945. The 26th Brigade Group was transported from Australia to Morotai by United States Army transports and arrived in mid-April and began to prepare their equipment for an amphibious landing. Due to a shortage of shipping all units were ordered to leave non-essential vehicles at Morotai when they began to embark onto assault transports on 20 April. The commander of the 1st Tactical Air Force attempted to resist this order, but was over-ridden by his superior officer Air Vice Marshal William Bostock. Most units were embarked by 22 April and the assault troops practiced landing operations for several days. A small convoy of ships carrying a force ordered to capture Sadau Island off the coast of Tarakan left Morotai on 26 April and the main invasion convoy of 150 ships sailed the next day.
Due to the need to clear both the large number of naval mines which had been laid around Tarakan and the extensive beach obstacles at Lingkas, the Allies did not attempt a surprise landing. A group of United States Navy minesweepers and destroyers arrived off Tarakan on 27 April and began clearing mines, most of which had been originally laid by Allied aircraft. This operation was completed by 1 May at a cost of two small minesweepers damaged.
On 30 April, the 2/4th Commando Squadron and the 57th Battery of the 2/7th Field Regiment was landed on the nearby Sadau Island in order to support the engineers tasked with clearing the obstacles off the invasion beaches. This force rapidly secured the undefended Island. The landing on Sadau Island was the first time Australian soldiers had landed on non-Australian territory in the Pacific since late 1941 (Australian participation in the New Guinea Campaign from 1942 onwards was limited to the Australian portion of New Guinea). The only Allied losses in this operation were onboard USS Jenkins which was damaged when she struck a mine while supporting the landing.
The task of clearing the beach obstacles at Lingkas was assigned to the 2/13th Field Company. These defences comprised rows of barbed wire, wooden posts and steel rails which extended 125 yards from the beach. At 11:00 on 30 April, eight parties of engineers went forward in LVTs and landing craft to clear the obstacles. The engineers were supported by the guns on Sadau Island and Allied warships and aircraft. Operating under Japanese fire the engineers cleared all the obstacles obstructing the landing beaches. While heavy casualties had been expected, the 2/13th completed their task without loss.
Landing
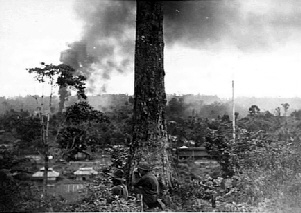
The main invasion force arrived by sea off Tarakan in the early hours of 1 May. Supported by a heavy air and naval bombardment, the 2/23rd Battalion and the 2/48th Battalion made an amphibious landing at about 08:00. No opposition was encountered on the beach, and the two battalions suffered only light casualties clearing the remaining coastal defences. By nightfall the Australian beachhead extended for 2,800 yards along the shore and up to 2,000 yards inland. Most of the 26th Brigade Group's remaining combat units, including the squadron of Matilda II tanks, were landed later on 1 May. Allied casualties were lighter than expected, with 11 men killed and 35 wounded. The light Japanese resistance was due to the heavy pre-landing bombardment forcing Tarakan's defenders to abandon the formidable defences at Lingkas.
While the infantry were successful in securing a beachhead, the landing was hampered by the poor beach conditions. Many Australian vehicles became bogged in Lingkas Beach's soft mud, and seven LSTs were stranded after their commander’s miss judged the ships' beaching. The small amount of solid ground within the beachhead resulted in severe congestion and resulted in none of 2/7th Field Regiment's guns being brought into action until the afternoon of the landing. The congestion was made worse by much of the RAAF ground force being landed on 1 May with large numbers of vehicles. The seven LSTs were not refloated until 13 May. After securing the beachhead, the 26th Brigade Group advanced east into Tarakan Town and north towards the airstrip. The Australians encountered increasingly determined Japanese resistance as they moved inland. The task of capturing Tarakan's airstrip was assigned to the 2/24th Battalion. The Battalion's initial attack on the airstrip on the night of 2 May was delayed when the Japanese set off large explosive charges, and the airstrip was not secured until 5 May. While the capture of the airfield achieved the 26th Brigade Group's main task, the Japanese still held Tarakan's rugged interior. During the first week of the invasion, 7,000 Indonesian refugees passed into the advancing Australian lines. This was a larger number than had been expected, and the refugees, many of whom were in poor health, overwhelmed the Dutch civil affairs unit. Despite the devastation caused by the Allied bombardment and invasion, most of the civilians welcomed the Australians as liberators. Hundreds of Indonesian civilians later worked as laborers and porters for the Allied force.
Securing the interior
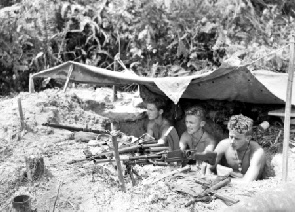
In order to secure the island and protect the airstrip from attack, the 26th Brigade Group was forced to clear the Japanese from Tarakan's heavily forested hills. Approximately 1,700 Japanese troops were dug into positions in the north and centre of the island. These positions were protected by booby traps and mines. While attacking these positions necessarily entailed costly infantry fighting, the Australian troops made heavy use of their available artillery and air support to minimize casualties. This was in line with General Thomas Blamey's order for the 26th Brigade Group to advance cautiously after the airfield was secured. The Australian tanks could only provide limited support to the infantry as Tarakan's heavy jungle, swamps and steep hills often confined their movement to tracks and roads. As a result, tanks generally could not be used to spearhead attacks, and their role was limited to providing supporting fire for infantry assaults, with artillery being the preferred source of direct support. The Japanese battery at Cape Djoeata on Tarakan's north coast was knocked out by USS Douglas A. Munro on 23 May.
The 2/3rd Pioneer Battalion and the NEI Company were assigned responsibility for securing the south-eastern portion of Tarakan. The Pioneers began advancing east of Tarakan Town on 7 May but encountered unexpectedly strong Japanese resistance. From 10 May, the battalion was halted at the 'Helen' feature, which was defended by 200 Japanese troops. On 12 May Corporal John Mackey was killed after single-handedly capturing three Japanese machine gun posts. Mackey was posthumously awarded the Victoria Cross for this act of heroism. During the fighting at Helen B-24 Liberator heavy bombers were used for close air support for the first time, with P-38 Lightning fighters dropping napalm immediately after the bombing. This combination proved particularly effective and became the standard form of air support requested by the Australians. The Japanese force withdrew from Helen on 14 May after suffering 100 casualties, and the 2/3rd Pioneer Battalion reached Tarakan's eastern shore on 16 May. The Battalion suffered 20 killed and 46 wounded in this advance. During this period the NEI Company secured the remainder of southern Tarakan, and encountered little resistance during its advance. The Japanese garrison was gradually destroyed, with the survivors abandoning their remaining positions in the hills and withdrawing to the north of the island on 14 June. On this day 112 Chinese and Indonesian laborers left the Japanese-held area with a note from a senior Japanese officer asking that they be well treated. While Radio Tokyo announced that Tarakan had fallen on 15 June the last organized Japanese resistance was encountered on 19 June and Whitehead did not declare the island secure until 21 June.
Construction problems
While the infantry of the 26th Brigade Group fought the Japanese in the hills, the RAAF engineers of No. 61 Airfield Construction Wing were engaged in a desperate effort to bring Tarakan's airstrip into operation. As the airstrip had been heavily damaged by pre-invasion bombing and lay in marshy terrain it proved much more difficult to repair than had been expected, and it took eight weeks and not the expected single week to restore the strip to a usable state. Extensive use was made of interlocking steel plates laid down like matting. Remnants of the plates still exist in the car park at Tarakan airport.
While the airstrip was finally opened on 28 June, this was too late for it to play any role in supporting the landings in Brunei or Labuan (10 June), or the landings at Balikpapan. However No. 78 Wing RAAF was based on Tarakan from 28 June and flew in support of the Balikpapan operation until the end of the war.
Efforts to re-start production at Tarakan's oilfields were delayed by serious damage to the facilities and Japanese holdouts, and they did not become operational until after the war.
Mopping up
Following the end of organized resistance the surviving Japanese on Tarakan split into small parties which headed to the north and east of the island. The 26th Brigade Group's main combat units were allocated sections of Tarakan which they swept for Japanese. Many Japanese attempted to cross the strait separating Tarakan from the mainland but were intercepted by Allied naval patrols. Allied troops also searched for Japanese on Boenjoe Island, fifteen miles north-east of Tarakan.
From the first week of July the surviving Japanese became short of food and attempted to return to their old positions in the centre of the island and raid Australian positions in search of food. As their hunger increased more Japanese surrendered. The Australian units continued patrols in search of Japanese until the end of the war, with several Japanese being killed or surrendering each day. These patrols cost the 26th Brigade Group a further 36 casualties between June 21 and August 15. 300 Japanese evaded capture and surrendered after the end of the war.
Aftermath
The 26th Brigade Group remained on Tarakan as an occupation force until 27 December 1945, though most of its units were disbanded in October. The Brigade's headquarters returned to Australia in early 1946 and was formally disbanded at Brisbane in January 1946.
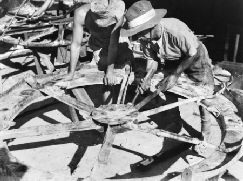
Tarakan's oilfields were swiftly repaired and brought back into production. Engineers and technicians arrived shortly after the Allied landing and the first oil pump was restored on 27 June. By October the Island's oilfields were producing 8,000 barrels per day and providing employment for many Tarakanese civilians.
The Allied units committed to the battle carried out their tasks with "skill and professionalism". In summing up the operation Samuel Eliot Morison wrote that "altogether this was a very well conducted amphibious operation which attained its objectives with minimum loss". The Battle of Tarakan emphasized the importance of combined arms warfare, and especially the need for infantry to cooperate with and be supported by tanks, artillery and engineers during jungle warfare.
Despite Morison's judgment, the 26th Brigade Group's casualties were high in comparison to the other landings in the Borneo campaign. The Brigade suffered more than twice the casualties the 9th Division's other two Brigades suffered during their operations in North Borneo and 23 more fatalities than the 7th Division incurred at Balikpapan. The 26th Brigade Group's higher losses may be attributable to Tarakan's garrison not being able to withdraw as the garrisons in North Borneo and Balikpapan did.
The landing force's achievements were nullified by the fact that the island's airfield could not be brought into action. The faulty intelligence assessments which lead the RAAF planners to believe that the airfield could be repaired represented a major failing. Moreover, the RAAF's performance at Tarakan was often poor. This performance may have resulted from the low morale prevalent in many units and the 'Morotai Mutiny' disrupting 1 TAF's leadership.
As with the rest of the Borneo campaign, the Australian operations on Tarakan remain controversial. Debate continues over whether the campaign was a meaningless "sideshow", or whether it was justified in the context of the planned operations to both invade Japan and liberate the rest of the Netherlands East Indies, which were both scheduled to begin in 1946. The Australian official historian Gavin Long's judgment that "the results achieved did not justify the cost of the Tarakan operation" is in accordance with the generally held view on the battle.

Royal Australian Army Ordnance Corps
Compared to other Corps in the Australian Army, the role of RAAOC and its many functions are little understood by the community at large. Its role is essential in providing the Army with all of its needs in both peace and war. Basic logistic problems such as maintaining the Army on the battlefield for protracted periods with weaponry, ammunition, communications equipment, combat supplies, petroleum products, all types of vehicles, aircraft, small craft, parachutes and aerial cargo equipment and aerial maintenance, medical and dental supplies, clothing, field equipment and field accommodation are just some of the tasks which are the responsibility of the RAAOC.
The RAAOC played a vital role in supporting the Australian Army to fulfil its assigned tasks in the defence and security of Australia during World War Two. No sustained military operation would be possible without the organisational skills of the RAAOC in providing essential logistic support to the Army, both in peace and when it is deployed in the field on exercises, or on operations.
Members of the Corps are nicknamed Roaches.
The Siege of Tobruk
Was a lengthy confrontation between Axis and Allied forces in North Africa during the Western Desert Campaign of World War II. The siege started on 10 April 1941, when Tobruk was attacked by an Italian-German force under Lieutenant General Erwin Rommel and continued for 240 days, when it was relieved by the Eighth Army during Operation Crusader.
Overview
For much of the siege, Tobruk was defended by the reinforced Australian 9th Division under Lieutenant General Leslie Morshead. General Archibald Wavell, Commander-in-Chief of British Middle East Command, instructed Morshead to hold the fortress for eight weeks, but the 9th Australian Division held it for over five months, before being gradually withdrawn during September and replaced by the British 70th Infantry Division, the Polish Carpathian Brigade and Czechoslovak 11th Infantry Battalion (East) under the overall command of Major-General Ronald Scobie. The fresh defenders continued to hold Tobruk until they were able to link with the advancing Eighth Army at the end of November during Operation Crusader.
The Royal Navy played an important role in Tobruk's defence, providing gunfire support, supplies, fresh troops and ferrying out the wounded.
Maintaining control of Tobruk was crucial to the Allied war effort. Other than Benghazi, Tobruk was home to the only other major port on the African coast between Tripoli and Alexandria. Had the Allies lost it, the German and Italian supply lines would have been drastically shortened. Furthermore, Rommel was in no position to attack across the Egyptian border towards Cairo and Alexandria while the Tobruk garrison threatened the lines of supply to his front-line units.
Tobruk marked the first time that the Blitzkrieg of the German Panzers had been successfully brought to a halt. Following Operation Crusader the siege of Tobruk was lifted in December 1941. However in 1942, after the defeating of allied forces in the Battle of Gazala, Axis forces captured the fortress.
Background
In early 1941 British forces were engaged in Operation Compass, an attempt to drive the Italians out of North Africa. On 21 January 1941 the Australian 6th Division made an assault to capture the Italian garrison of Tobruk which offered one of the few good harbours between Alexandria and Tripoli.
The Italian troops generally offered little resistance - large numbers surrendered without fighting. The Italian commander, General Petassi Manella, surrendered himself after only 12 hours, but he had refused to order the surrender of his forces, which meant that it took a further day to clean up any resistance. Australian casualties were 49 dead and 306 wounded, while capturing 27,000 Italian POWs, 208 guns, 28 tanks, many good quality trucks and a large amount of supplies. They also found that the Italians had constructed some impressive defences, including a perimeter of concrete pits.
By the end of the first week in February Operation Compass had resulted in the Italian forces being driven from Cyrenaica and in the surrender of the Italian Tenth Army.
However, the Allies were unable to take advantage of their victory. With the Italians close to collapse, Winston Churchill commanded the British General Staff to call a halt to the offensive in order to allow many of the most experienced units from Richard O'Connor's XIII Corps to be moved to Greece to fight in the Battle of Greece.
The experienced 6th Australian Division and the fully-trained and equipped New Zealand Division were withdrawn from Egypt and the Western Desert to go to Greece while the tanks of 7th Armoured Division, after eight months fighting, needed a complete overhaul and the division was withdrawn to Cairo and ceased to be available as a fighting formation. XIII Corps was wound down to become a static HQ and O'Connor became commander British Troops Egypt (in Cairo) while Lieutenant-General Sir Henry Maitland Wilson became military governor of Cyrenaica before leaving to command the expeditionary force in Greece. Cyrenaica was left with only the inexperienced and under- strength 2nd Armoured Division (whose tanks were also in a poor mechanical state) and the newly-arrived (and only partly-trained) 9th Australian Division. The British 6th Infantry Division was being formed from various battalions in Egypt but had no artillery and supporting arms while the Polish Brigade Group was not yet fully equipped.
The Allied position in Cyrenaica was rendered more difficult by supply difficulties caused by air attacks on Benghazi. Stripped of anti-aircraft and fighter defenses which had been sent to Greece, the port had become so dangerous for Allied shipping that by the third week in February it had had to be closed and forward units supplied from Tobruk, a further 200 miles (320 km) east. As a result, practically all available vehicles had to be committed to transporting supplies, so compromising the mobility of the fighting units.
Meanwhile the Germans had started to concentrate in Africa the two divisions of the Africa Korps under Erwin Rommel (see Operation Sonnenblume) in an attempt to prevent total collapse of the Italian forces. The British High command was ignorant to this. Circumstantial evidence began to accumulate of the presence of German units in Libya but with no ground intelligence to confirm this and long-range reconnaissance aircraft committed to Greece Wavell, "very much in the dark as to the enemy's real strength or intentions", believed that an enemy attack was unlikely until the middle of April or possibly May.
Rommel takes the initiative
On 24 March Rommel advanced with the newly arrived Africa Korps. 2nd Armoured Division fell back before the as yet tentative Axis advance with the intention of flanking an enemy advance along the coast to Benghazi while blocking any move towards Mechili. However, on 3 April the division's commander, Major-General Gambier-Parry received a report that a large enemy armoured force was advancing on Msus where the division's principal petrol and supply dump lay. The division's tank brigade (British 3rd Armoured Brigade) moved to Msus to find that all the petrol had been destroyed to prevent capture by the enemy. Henceforth the brigade's activities were almost entirely dictated by their lack of fuel. The tank brigade, by that time fielding only 12 Cruiser tanks, 20 light tanks and 20 captured Italian tanks as a result of losses and more importantly mechanical breakdown, were ordered to withdraw to Mechili to be joined by 3rd Indian Motor Brigade. However, during a period of confusion caused by communication breakdowns as Axis air raids successfully attacked fuel and radio trucks, the divisional HQ arrived at Mechili on 6 April but the tank brigade, short of fuel, headed to Derna where it was subsequently cut off and captured.
Meanwhile, threatened by envelopment, the 2nd Support Group was ordered back towards Regima and after that to Derna. As a result of these events, both the route to Benghazi and Mechili were uncovered and Rommel brought forward along the coast road, elements of the 17th "Pavia" and 27th "Brescia" Divisions while pushing his mechanized and motorized units across country, south of the Jebel Akhdar (Green Mountains) towards Mechili after the retreating British tanks. On 6 April the leading Bersaglieri columns of the Italian Ariete Division reached Mechili.
On 6 April Lieutenant-General Philip Neame, by that time the military governor of Cyrenaica (Wilson had been sent to command W Force in Greece), withdrew his headquarters to Tmimi, west of Tobruk. During the withdrawal his staff car was stopped by a German patrol near Martuba and both he and O'Connor (who had been sent forward from Cairo by Archibald Wavell, C-in-C Middle East Command to advise) were taken prisoner.
The Allied force at Mechili consisted of the Headquarters 2nd Armoured Division (mainly unarmoured vehicles), 3rd Indian Motor Brigade and elements of other units including some guns from 1st Royal Horse Artillery. Surrounded, they fought bravely in defence of Mechili but on 8 April Gambier-Parry surrendered to General Zaglio of the "Pavia" Division. 2,700 British, Indian and Australians were captured at Mechili after an attempted breakout was broken up by the Ariete's "Fabris" and "Montemurro" Bersaglieri Battalion groups. Only small groups managed to get away.
Rommel's initial attack plan called for his tanks to sweep around Tobruk to the Eastern side and attack from the Bardia road, so cutting the town off from Cairo. Approaching Tobruk, however, wishing to maintain his momentum, he ordered General Heinrich von Prittwitz und Gaffron, commander of the newly-formed 15th Panzer Division (most of which had yet to arrive in North Africa), to take the three battalions from his division then available to him (his reconnaissance, machine gun and anti-tank battalions) and to attack Tobruk directly from the West along the Derna Road. Rommel expected that the Allied forces would crumble under this attack. However, the two Australian brigades which had been west of Tobruk had succeeded in withdrawing in good order to Tobruk to join a third which had been performing garrison duties, as had the 2nd Support Group and the 2nd Armoured Division's armoured car regiment.
Soldiers from the Australian 2/28th Infantry Battalion spotted three armoured cars and fired the first shots of the siege using two captured Italian field guns for which they had only had one week's training. The cars quickly retreated. As the tanks approached a bridge crossing a wadi on the perimeter of Tobruk the Australians blew it up. When von Prittwitz urged his staff car driver to drive him through the wadi and towards the Australians his men called for him to stop, but he replied that the enemy was getting away. The staff car drove into the firing line of a captured Italian 47 mm anti tank gun, whose gunner fired, destroying the car and killing both von Prittwiz and his driver. A three hour skirmish then ensued after which the Germans retreated. In the meantime the Allies continued to work on their defences, laying barbed wire, mines and other obstacles. The Australian commander, Lieutenant General Leslie Morshead divided the 50 kilometers’ (31 mi) perimeter of Tobruk into three rough sectors. It would be the job of the three Australian infantry brigades to ensure these were not breached. The 26th would hold the western sector, the 20th would hold the south and the 24th would hold the east. Morshead also ordered all Italian signal cables to be re-laid. He wanted to know what was happening, and where, so he could adjust his forces accordingly. He also kept a reserve of runners in case the telephone lines were disrupted by the German attack.
On 11 April, with his forces regrouped, Rommel reverted to his original plan, sending his tanks around Tobruk to the Bardia Road.
The city was now besieged on three sides (the harbour was in Allied hands) by the Africa Korps composed of the 5th Light Division and elements of 15th Panzer Division, and by three Italian infantry divisions and the Italian Ariete Armour Division. The Allied forces consisted of the Australian 9th Infantry Division's three brigades and Australian 18th Infantry Brigade of the Australian Imperial Force which Wavell had detached from Australian 7th Infantry Division and ordered forward as reinforcements, as well as 12,000 British, mainly Royal Artillery and Logistics units but also the HQ 3d Armoured Brigade with around 60 functional tanks and 1,500 Indian soldiers including the 18th Cavalry Regt.
The Easter Attack
Just after noon on 11 April 1941, the Germans and Italians positioned themselves for a concentrated attack on the city. To exaggerate the size of their force and strike fear in the defenders, they were ordered to make more dust than normal. The 5th Panzer Regiment of the 5th Light Division drew fire first to try to assess the defence. Within an hour, five of the German tanks were destroyed and the others pulled back. At 3:00 PM the men of the 2/13th Battalion saw about 400 German soldiers approach. The Australians' defensive fire forced the Germans to retreat, carrying their dead and wounded with them.
At 4:00 PM, a platoon-sized formation from the 2/17th Battalion saw 700 Germans launching an attack on their position. The Australians were outnumbered and outgunned with only two Bren guns, a few dozen rifles and a couple of Boys anti-tank rifles. The Australian artillery opened fire and inflicted significant casualties, but the German soldiers kept advancing. Several groups of Panzers and Italian M13s advanced on the Australians. As the Axis armour closed in, four British tanks arrived, firing over the head of the infantry. The Axis tanks could not hurdle the obstacles set for them and they fell back to regroup. This attack yielded only one dead on the Allied side.
Morshead's defence plan was aggressive. He ordered rigorous patrolling of the anti-tank ditches and more mines laid. The aggressive patrolling appeared to work. The 2/13th Battalion encountered a German raiding party with a large amount of explosives. The party had clearly intended to blow the sides of an anti-tank ditch, allowing easier passage for tanks to cross - but they were forced to retreat.
In cases where panzers and Italian tankettes did reach or pass the Australian lines, the infantry — ensconced in well- built strongpoint’s, including many installed by the original Italian garrison — simply concentrated on the German or Italian infantry, knowing that the tanks' guns could not be brought to bear on them and the Axis tanks would face anti- tank guns in the second line of defences. On the most important of these attacks on 1 May, a combined Italo-German infantry and armour force attacking, had its armour driven back and the infantry stood and fought behind Australian lines for quite some time before they withdrew.
On 15 April 1941 an Australian fighting patrol was returning from patrolling in the area of 2/48th Battalion when, at about 5.30 p.m, an Italian attack threatened to overwhelm the forward positions of the 2/24th Battalion. Italian infantry numbering about 1,000 advanced on the bunkered platoons against mortars, rifle and machine gun fire and one post was overrun. Early in the battle, the 2/23rd Battalion's 'B' Company also arrived and engaged the Italian force. The combination of aggressive fire from the Australian soldiers plus devastating fire from the 51st Field Artillery Regiment swung the battle in the Australians' favor. The aggressive Australian patrolling continued and on 16 April, the main body of the 1st Battalion 62nd "Trento" Regiment was encountered approaching from Acroma. The Italian battalion then came under heavy shellfire and were halted. About half a battalion of panzers of the German 5th Armoured Regiment followed the Italian infantry but, as they reached the perimeter defences, came under intense fire from the 51st Field Artillery Regiment and withdrew. The 2/43rd Battalion War Diary reported that "The Italians attacked our 48 Btn and whilst withdrawing they (the Italians) were fired upon by German tanks believed to be supporting the attack." The Australians sent out Bren gun carriers specifically to find the Italian battalions' flank. The extra fire-power finally stopped the Italians, and all firing ceased. A British communiqué on 17 April 1941 described the actions:
One of our patrols successfully penetrated an enemy position outside the defences of Tobruk capturing 7 Italian officers and 139 men. A further attack on the defences of Tobruk was repulsed by artillery fire. The enemy again suffered heavy casualties. During yesterdays operations a total of 25 officers and 767 of other ranks were captured. In addition over 200 enemy dead were left on the field.
An intelligence assessment by the 2/43rd Battalion concluded that:
Reports from PW indicate that a large scale attack was to have been launched on the Tobruk defences on or about 16 April 41. There appears to have been no co-ordination between enemy tanks and inf units. The ITALIANS appear to have been some what in the dark as to their actual objectives and the method of co-ordination by means of GERMAN liaison officers working with ITALIAN units has not been successful. PW also state that the spasmodic attacks in different sectors between 14 and 16 Apr, were all intended to be a simultaneous assault which apparently went badly astray in its timing.
Raid on Bardia
In the meantime a British battalion was selected for a raid on Bardia, with the object of harassing Rommel's line of communication and inflicting as much damage as possible. The attack was conducted on the night of 19-20 April by No. 7 Commando and a small detachment of the Royal Tank Regiment aboard the supply ship HMS Glengyle, escorted by the anti-aircraft cruiser HMS Coventry. HMAS Stuart, Voyager and Waterhen covered the landing of British Commandos. During the raid a Commando sentry mortally wounded a British officer and one detachment of 67 men were later reported captured in a counterattack on the beaches. The author Evelyn Waugh, who took part in the raid, related in an article he wrote for Life Magazine in November 1941 that the Germans "sent a strong detachment of tanks and armoured cars to repel the imagined invasion". However, in his personal diary published in 1976, a very different picture emerged of incompetent execution by the commandos against virtually no opposition.
Aftermath of the Axis attacks in March and April
The Tobruk defenders had been fortunate that Rommel had concentrated his attacks on the strongest parts of the Tobruk defences which were around Ras el M'dauar. Although the Italians had spent considerable effort in building permanent defensive works, they were at their weakest in the south-east sector, an area overlooked and dominated from without by the hills of Bel Hamed and Sidi Rezegh. The advancing Allies had exploited this when capturing Tobruk from the Italians in January 1941 but, inexplicably, Rommel had ignored this. He appeared to have learned his lesson, however, by June 1942 after the Battle of Gazala when Tobruk fell relatively easily to Rommel's attack from the south-east.
Both sides set to re-building and re-inforcing: Rommel for a further attack on Tobruk in order to free his threatened lines of communication and resume the advance into Egypt, Wavell to stabilize the front on the Egyptian border and prepare an assault to relieve Tobruk.
In May 1941 Wavell launched Operation Brevity, a minor offensive that attempted to gain a better position to launch a major offensive in the summer; as a secondary objective, if the opportunity presented itself, an attempt to relieve Tobruk was to be made. The operation however achieved little other than the recapture of the Halfaya Pass.
The Battle of the Salient
On 30 April, the Axis forces second attack attempting to push through the perimeter at post S.1 and push through into the centre of Tobruk. The attack captured an 8 km wide by 3km deep section of territory. However, the battle caused heavy losses to Rommel's forces, and he did not attempt another major attack in the immediate future.
At about 2000 hours tanks moved up to the perimeter wire in front of S.1 and, using grappling hooks, pulled it away. Tanks from 5 Panzer company and supporting infantry from the 2nd Machine-Gun Battalion and a Pioneer Battalion proceeded to clear up the bunkers manned by Captain Fell's 'A' Company, 2/24th Battalion. Post S1 was the first to succumb. Two panzers drove to 100-200 yards of the post, and opened fire, and, after a brief fight (in which three men were killed and four wounded), Lieutenant Walker and his men surrendered. These tanks then proceeded to attack S.2 (Major Fell), which contained the Company HQ and 7 Platoon. Getting to within 200 yards, the panzers opened fire, shredding sandbags on the parapets and blowing up sangars. On each tank were riding German infantrymen, who under cover of the tanks' fire, ran forwards with grenades. S.2 then surrendered.
Then was the turn of 9 Platoon dug in posts R.0 and R.1 – after a fight in which three were killed and four wounded, the posts surrendered. The crews of two RHA 2-pounders put up a fight, knocking out some of the panzers, but when the guns tried to turn to engage panzers moving to their flank, they exposed themselves to German machine-gunners, with the gunners either killed or wounded. The bunkered platoons from the neighboring C Company from 2/24th Battalion were also attacked. Post S.5 was taken at first light on 1 May, but Posts S.4 (Corporal Deering) and S.6 (Captain Canty) held out grimly until the morning. Post S.7 (Corporal Thomson) stubbornly resisted, inflicting heavy casualties on the attacking Italians, before the attackers were able to throw in grenades. Attacks by Italian infantry, on posts S.8, S.9 and S.10 were repelled. Nevertheless 'C' Company suffered 20 men killed and wounded, and another 44 taken prisoner in the fighting in the northern sector that largely employed troops from the "Brescia" Infantry Division.
The attack in the southern sector also involved Italian troops and Lieutenant Mair's 16 Platoon from 'D' Company defending Posts R.2 and R.3 and R.4 were overrun. According to an Australian defender, "That night the slightest move would bring a flare over our position and the area would be lit like day. We passed a night of merry hell as the pounding went on." Italian infantry were then able to close in, and stick grenades were thrown into the bunkers. Nevertheless, Posts R.5 (Sergeant Poidevin), R.6 (Captain Bird) and R.7 (Corporal Jones) were taken only after stubborn resistance, and fought on until they had run out of ammunition or had stick grenades tossed into the firing pits. After they had been taken prisoner, General Rommel spoke to them "for you the war is over and I wish you good luck", recalled Corporal Jones.
The 51st Field Regiment had been constantly firing, causing an entire German battalion to go to ground and, according to Rommel, creating panic in the Italian infantry. Seven British Cruiser and five Matilda tanks also appeared in the Italian area of penetration, to engage in an inconclusive tank battle with Italian tankers.
The attack faltered when the Panzers leading the assault ran into a minefield placed by Morsehead to stop any breaches of the blue line. A Panzer officer recalled: "Two companies get off their motor Lorries and extend in battle order. All sorts of light signals go up - green, white, red. The flares hiss down near our own MGs. It is already too late to take aim. Well, the attack is a failure. The little Fiat-Ansaldos go up in front with flame-throwers in order to clean up the triangle. Long streaks of flame, thick smoke, filthy stink. We provide cover until 2345 hours, then retire through the gap. It is a mad drive through the dust. At 0300 hours have snack beside tank. 24 hours shut up in the tank, with frightful cramp as a result - and thirsty after several tanks lost their tracks the remaining Panzers retreated.
Rommel's troops had captured fifteen posts on an arc of three-and-a-half miles of the perimeter, including its highest fort. But the Australians had largely contained this Italo-German thrust. One German POW said: "I cannot understand you Australians. In Poland, France, and Belgium, once the tanks got through the soldiers took it for granted that they were beaten. But you are like demons. The tanks break through and your infantry still keep fighting." Rommel wrote of seeing "a batch of some fifty or sixty Australian prisoners [largely from C Company of the 2/24th Battalion that had been taken prisoner by the Italians]... marched off close behind us—immensely big and powerful men, who without question represented an elite formation of the British Empire, a fact that was also evident in battle." Nevertheless Australian losses had been considerable. The 2/24th Battalion alone had lost nearly half its strength killed, wounded or taken prisoner Rommel placed the blame for the failure to capture Tobruk squarely on the Italians. However, it was the 19th and 20th Infantry Regiments of the 27th "Brescia" Division along with the 5th and 12th Bersaglieri Battalions of the 8th Bersaglieri Regiment, the 3rd Company, 32nd Combat Sappers Battalion and "Ariete" Armoured Division who after much hard fighting, had possession of most of the positions which the Australians had lost. The 7th Bersaglieri Regiment soldiers bunkered along the newly captured concrete bunkers. The Australians fought hard to win back their positions. Much fierce hand-to-hand fighting took place from 1 May till the end of August 1941 when finally the weary soldiers of the 7th Bersaglieri were ordered move to Ain Gazala to rest and refit. According to an Australian soldier, "In Tobruk we became part of the 9th Division with the 28th and 16th Battalions. Each Platoon had to do two or three weeks in the Salient, which was a section of ‘no man’s land’ where the enemy had driven us back from fortifications that skirted Tobruk from sea to sea. Time up there wasn’t exactly pleasurable. We were in dugouts with interconnecting trenches about a foot or so deep (hence becoming known as the ‘rats of Tobruk’). The Germans pummeled us with trench mortar bombs and also had fixed machine guns firing on us." Rommel was impressed by the conduct of the Australians. The heavy losses incurred by the attackers led the commanders of the Italian divisions and the German 5th Light Division to argue against further attacks until better preparations could be made. Rommel decided to hold off further major attacks until the end of November 1941, awaiting the arrival of more German forces and allowing more training of his forces in the art of siege warfare.
The Siege
The besieging troops were mainly Italian belonging to the following 5 Divisions: the "Ariete" and "Trieste" (the XX Motorized Corps), the "Pavia", "Bologna", and "Brescia" (the XXI Infantry Corps). The Australian commanders remained determined to recapture the ground lost on 1 May. On 3 May the Australians launched a counterattack employing the 18th Brigade but by 4 May were only able to recapture one bunker. An Australian historian wrote later that the Italians were involved in the action in the Australian attacks on the outposts of R2, R3, R4, R5, R6, R7 and R8. On the night of 16 May the Italians retaliated and two platoons of the 32nd Combat Sappers Battalion breached the barbed wire entanglements and minefields guarding the forward bunkers manned by the 2/9th and 2/10th Battalions. With the obstacles removed, the "Brescia" Division who brought flame-thrower parties and tanks assaulted the defences and overpowered a number of bunkered platoons. The desperate defenders fought back with terrible ferocity and the Commanding Officer of the 32nd Combat Sappers, Colonel Emilio Caizzo was killed in a satchel attack on an Australian machine-gun position which was to earn him a posthumous Gold Medal. Although the Australian Official History describes losing three positions to German attackers an Italian narrative has recorded:
On the night on 16 May 1941, two platoons of the 3rd Combat Engineer Company in union with assault groups of the "Brescia" Infantry Division, which had been sent as reinforcements on the 11th of that month, initiated the attack. With total disregard to danger and usual stealthiness, the combat sappers opened three paths in the wire fencing in front of each assault group. They used explosive charges in tubes. Fighting side by side with the assaulters, in fierce hand-to-hand combat, they inflicted heavy losses on the enemy, and obtained the objective. Major-General Leslie Morsehead was furious and ordered the Australians to be far more vigilant in the future. On 2 August, in the belief that the enemy battalions had largely abandoned various posts along the Salient, an attack was launched by a company of the 2/43rd Battalion and a company of the 2/28th Battalion from the town. The attack was skillfully planned and supported by more than sixty field guns but the enemy infantry swiftly replied, and the attack failed with heavy loss of lives. This was the last Australian effort to recover the lost fortifications. There has been criticism leveled at General Morshead for the failure of the attack.
All change in the Tobruk defences
In the summer of 1941 the Prime Minister of Australia, John Curtin, insisted on the withdrawal of 9th Australian Division from Tobruk. Based on reports from Australian H.Q. Middle East that the health of the troops had been suffering he rejected requests from Winston Churchill to change his mind and the replacement of the division was effected by the Royal Navy during August and September. During 9th Australian Division's stay in the besieged Tobruk some 3000 Australians had become casualties and 941 taken prisoner. As the Australians were gradually withdrawn they were replaced by the British 70th Infantry Division, the Polish Carpathian Brigade and Czechoslovak 11th Infantry Battalion (East). Moreshead was succeeded as commander of the Tobruk fortress by 70th Division's commander, Major-General Ronald Scobie.
End of the siege
On 15 June Wavell launched Operation Battleaxe, a land offensive intended to relieve Tobruk. The failure of Battleaxe led to the replacement of Wavell as C-in-C Middle East Command by General Claude Auchinleck. The Western Desert Force was reinforced and reorganized to form a two corps army designated Eighth Army commanded by Lieutenant-General Alan Cunningham. Auchinleck launched a major offensive, Operation Crusader, on 18 November which led to the relief of Tobruk at the end of the month and the occupation of the whole of Cyrenaica by the end of the year.

World War Two (WWII)
During the war the RAAOC (MSC) saw service on all fronts. The best remembered is the role played by the Corps in supporting the 9th Australian Division in the defence of Tobruk. It was there that General Mosehead ordered the formation of an infantry battalion thereby authorising its soldiers to draw bayonets. The MSC could not provide a mortar company and subsequently provided four MSC companies, which were utilised as infantry. One of these companies served on the eastern edge of the defence perimeter for six months without relief thereby giving them the distinction of gaining the longest, continuous period of service on front line duty in the Siege of Tobruk. Later these same troops distinguished themselves in the Battle of El Alamein (1942) where, performing their normal corps role, they sustained the 9th Australian Division throughout that momentous operation. Today the home of the RACT at Puckapunyal bears the name Tobruk Barracks.